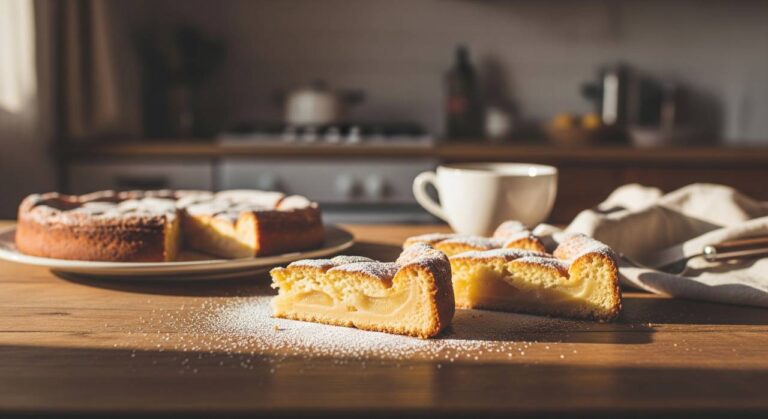


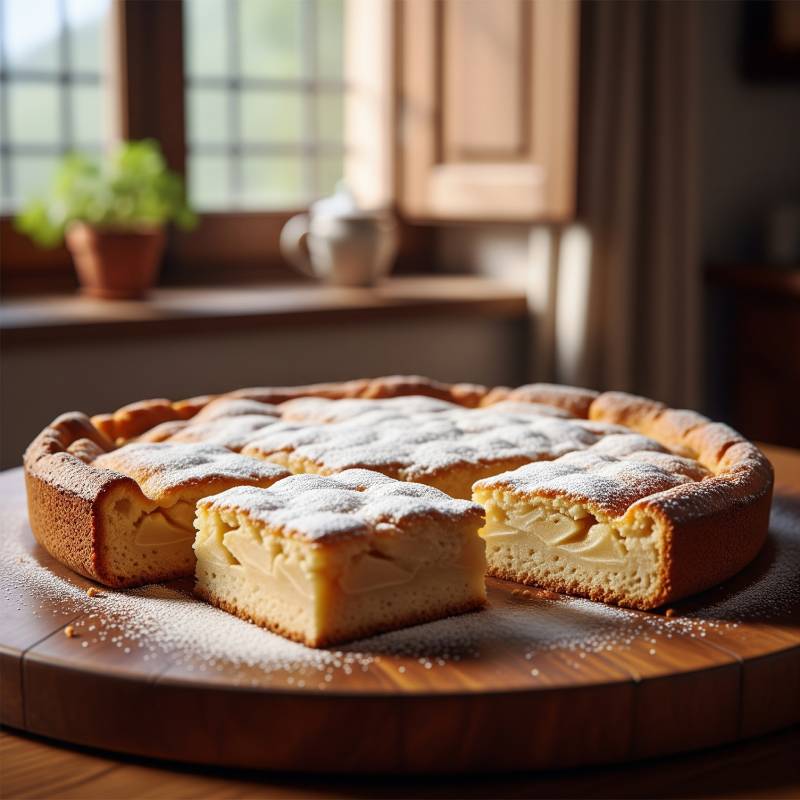
There’s a scent that has the power to embrace us: that of apples baking slowly in the oven. It’s one of those emotional memories that transports us to a place of comfort, to nonna’s kitchen, where magic happened with simplicity and love. This is the very soul of our flourless apple cake, a variation of the classic delicious apple pies for flour-free diets. A recipe that proves you don’t need many tricks to create something truly memorable.
With just three main ingredients, this little cake is a surprise: an incredibly creamy texture, almost like a delicate pudding that melts in your mouth. It’s the perfect dessert for a leisurely afternoon coffee, a healthy snack, or when your soul craves a treat that is also a caress.
Get ready to be enchanted by its ease and flavor. Let’s rediscover the beauty of simple and genuine cooking together.
🌿 Ingredients (Few & Magical)
- 2 large or 3 medium apples (Fuji or Gala are great options as they are sweet and firm)
- 3 large eggs, preferably free-range
- 1 container of Greek yogurt (approximately 170g / 6 oz)
- Optional for aroma: 1 teaspoon of ground cinnamon and/or the zest of 1/2 lemon.
- Optional for finishing: Powdered sugar or cinnamon for dusting.
👩🍳 Method (Simple Step-by-Step)
- 🍎 Preparing the Apples: Preheat the oven to 180°C (350°F). Peel the apples, remove the core, and either grate them or chop them into very small cubes and pulse them in a food processor. I also make it without processing, leaving them in small cubes.
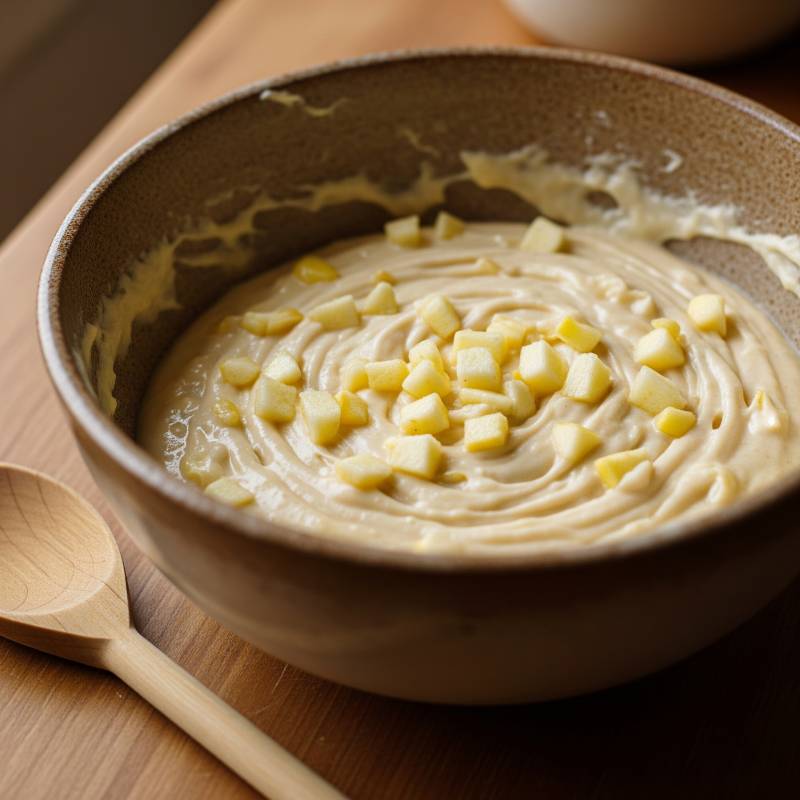
- 🥣 The Magic of the Mixture: In a bowl, beat the eggs with a fork or a whisk until smooth. Add the Greek yogurt and lemon zest (if using) and mix gently.
- ✨ Uniting the Flavors: Gently fold the apple cubes into the yogurt and egg cream.
- 🔥 Into the Oven: Pour the mixture into a small baking dish (approximately 15×15 cm / 6×6 inches) greased with butter or lined with parchment paper. Bake in the preheated oven for about 30-40 minutes, or until the surface is golden and a toothpick inserted into the center comes out clean.
- ☕ The Final Touch: Let the cake cool slightly before cutting. It becomes even tastier and firmer after resting for a bit. Serve cut into squares, dusted with powdered sugar or more cinnamon.
✨ Variations & Secrets
- Crunch: Add a handful of chopped walnuts or almonds to the batter for a crunchy texture.
- Special Aroma: A teaspoon of vanilla extract or a few raisins soaked in rum also enrich the flavor.
- Other Fruits: This recipe is wonderful with firm pears instead of apples. Follow the same preparation method.
☕ How to Serve: A Special Moment
This warm cake is the perfect companion for an espresso or a creamy cappuccino. For a more complete dessert, serve a slice with a scoop of gelato di crema (vanilla ice cream) or a spoonful of artisanal dulce de leche.
💡 Veramente Italiana’s Golden Tip
The secret to this cake’s creaminess lies in the Greek yogurt. Its high-fat content and low amount of whey ensure a rich and velvety texture, similar to a baked cheesecake but with a surprising lightness. Do not use very liquidy yogurts, as they can alter the result.
Cooking, for us Italians, is one of the most genuine acts of love. I hope this simple recipe brings a bit of Italian warmth to your home and your table. Experiment, create your own versions, and above all, share this sweet moment with those you love.
Enjoy your meal!
❓ FAQ – Frequently Asked Questions
Question 1: Can I substitute the Greek yogurt with another type of yogurt? Answer: Yes, you can use plain whole Greek yogurt or flavored ones, but do not use regular yogurt as the result will be less creamy and more liquid. Greek yogurt is ideal for its firm consistency, which gives the cake better structure.
Question 2: How do I know when the cake is perfectly baked? Answer: The ideal point is when the edges are firm and golden, and the center is almost fully set, with only a slight wobble. Do the toothpick test: if it comes out clean, it’s ready. Remember that it will continue to set as it cools.
Question 3: Can I make this in individual cupcake liners? Answer: Yes!! And it turns out great!!

 ✍️ Idealizadora e autora do Verament...


")